|
|
|
|
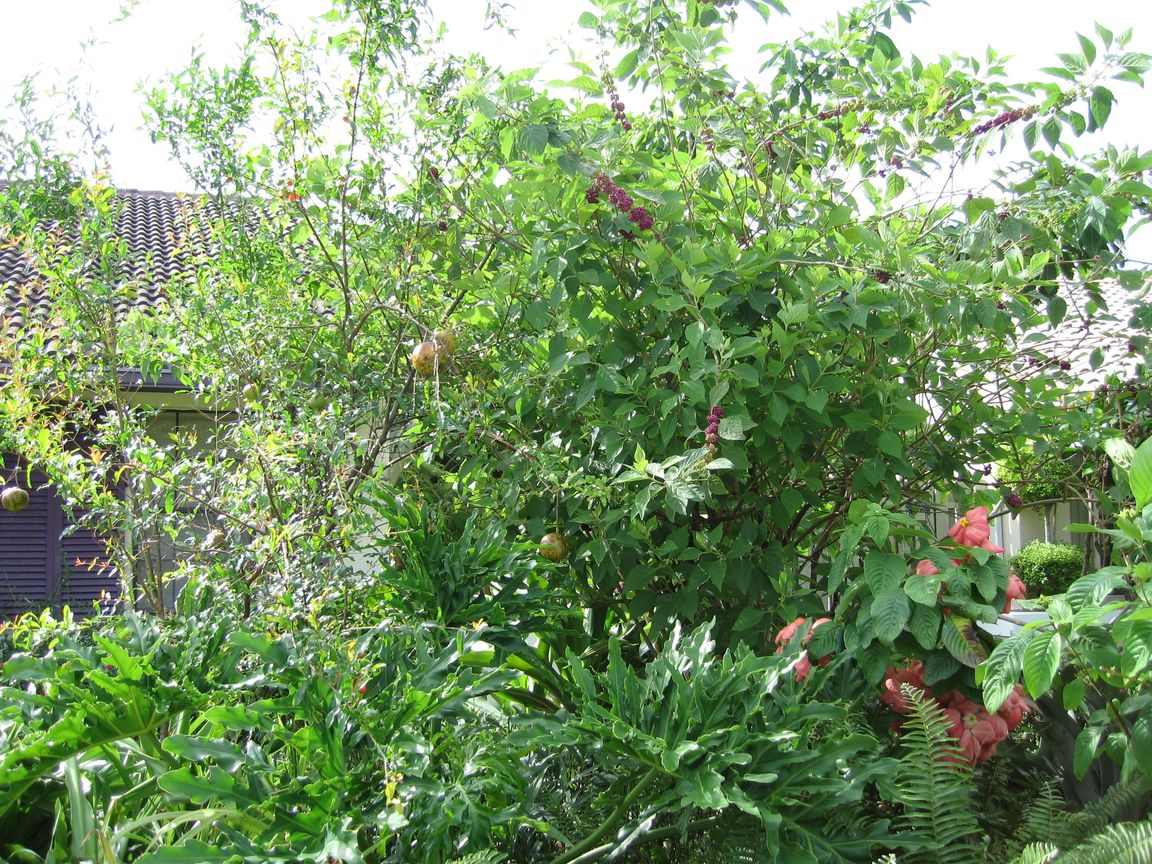
Pomegranates and
Beautyberries on the Mound Haven’t done anything much in this department for a few years,
though many perennial plants were still supplying us with food, no work required. Things like Bananas, Chaya, Elderberry,
Myer Lemon, Cranberry Hibiscus and Sweet Potatoes produced as if nothing had
happened, and the new fruit trees we planted survived, though only the
Pomegranate and Grumichama came into production. I haven’t pushed anything with
fertilizer, which is what everyone recommends, but goes against my grain
ecologically. I have been using worm
castings and poultry-manure-based amendments this year, though, and that will
probably make a difference. Someone
gave me a ripe Guanabana, which we ate and shared the seeds from. We got a baby tree out of that, which could
give us fruit as soon as four years from now.
The parent was seed-grown, and took that long to begin producing. (Note that tropical fruit seeds should be
planted very fresh, and never refrigerated because that will kill them.) Also
planted a Mulberry tree this summer. We topped the Jackfruit to keep it from
getting too tall, and will do the same with the Mulberry and the fruit trees
we plant in the future. Every time we
eat a papaya, I toss the seeds into the back garden, and every year we have a
few trees come up. Most years we get
mainly females, but last year there was only a large male. I am happy to report he is still going
strong and now has a harem of six female beauties, some of them beginning to
fruit as I write. We are planning a
trip to ECHO soon for tropical edibles, and one to Excalibur Nursery for more
fruit trees, likely in June or July, when the weather has warmed up and these
things will start growing. In October,
we went to the The Succulent beds have been mostly turned into berry patches, with
Blackberries on the South side and, if they do well, Raspberries on the North
side, but there are still succulents on the two ends, and Periwinkles and
Four-o’clocks filling in the spaces. This year I decided I’d have a vegetable garden if it killed me,
so I ordered all new seed, started giving the old away, and got
planting. This time, I planned better
so there wouldn’t be too much to care for, with no idea where to put it
all. So far, this approach has worked
beautifully. I made a plan for the
Potager and figured out just how much space was available in the TVA and what
to put in it. Started planting seeds in the third week of September and
haven’t looked back. Another exciting thing this year has been the addition of several
self-watering containers, which have been so successful that there will be
many more by season’s end. These
should last several years, and can be replaced easily and cheaply when they
finally fall apart. There are some
pages on the Internet about how to construct these, though one of the best
was taken down because the author used Earthbox in the name. This is a brand of high-quality, and very
high-priced self-watering containers, and the manufacturers were not happy
about that person using their name. He
hasn’t gotten around to changing the document and re-posting it to the
web, but you can probably find it archived on Google – I did (look for
“homemade earthbox, then choose the Cached link”, or try
“self-watering container” but you’ll mostly get links for a
lot of expensive ready-made ones). I
also read an excellent book, “Incredible Vegetables from Self-Watering
Containers” by Edward C. Smith, which covers everything about using,
but nothing about constructing them.
There is a blurb about modifying a conventional container with a
self-watering insert, but these don’t hold much water and I can’t
seem to find them anymore. Someday
when I have some time, maybe I’ll post my version of how to construct
these, one that doesn’t involve cutting 4” PVC pipe, a feat too
hard for me to do with a hacksaw. I
can tell you now – there are easier ways. Email me if you’d like more info, but
a quick tip if your container will not be moved is to use a concrete block
instead – works perfectly and nothing needs to be done to it – no
drilling or anything, since it is very porous, and it will hold up the false
bottom in a very stable way. We had
some lying around and didn’t know where to put them until this thought
struck. You could also use bricks for
support and pond baskets or ordinary old nursery pots with holes drilled or
cut into them for the soil wick. Using
Ed’s book, we determined the best things to grow in self-watering
containers and what capacity each of these plants needs. Right now, we have one of salad greens, two
of small melons, and one with a tomato, with several more tomato and pepper
and eggplant ones to be constructed this month, and three or four more for
salad greens, since we will plant one of these per month for a good rotation
of cut-and-come-again greens. The
salad green ones we use two storage bins for, and no support is needed
between them. For the others, we used
the bin’s lid as the false bottom, saving around $6 on the cost of each
container. For cucumbers, we will make
some by nesting the containers we already have inside food-grade 5-gallon
buckets, using old cloth to make several wicks for each, and drilling more
holes in the bottoms of the top containers for better air circulation. A watering tube of old hose and an overflow
hole drilled in the bucket will complete the design. A funnel is useful for filling these, as
the hose is fairly small. The others
we made have 1-1/2” PVC pipe watering tubes, which are easy to put the
end of the watering hose into. All our
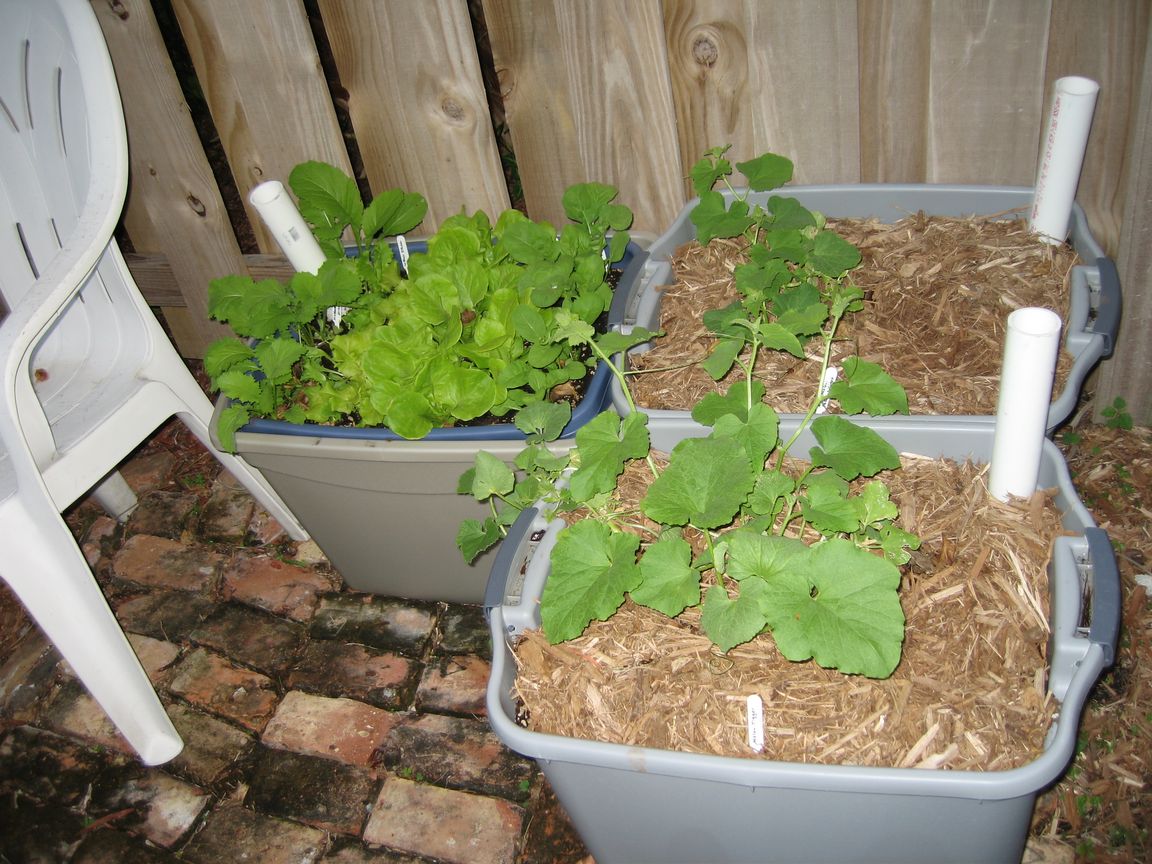
containers are wicking very well, keeping the soil evenly moist all the time.
Self-watering containers
with salad greens and small melons Click here for the Potager Plan for
2008-9, and here for the Crop Chart. The chart lists all the herbs, edible
flowers and vegetables we are growing this year, whether starting with seeds
or plants, the sources we got them from, where they are planted, and dates of
planting/sowing, sprouting, transplanting, and harvesting. We haven’t planted all the types of
seeds yet (only most of them :)), but will as the season progresses. There are around two hundred varieties in
our back garden this year. Within six
weeks, we were able to harvest cabbage family greens, and everything else is
beginning to come ready now, after about two months. Letuces and radishes are faster, but we
couldn’t plant them until mid-October, when the hot weather broke. More varieties of herbs will be added, as
we will soon be ordering from Seminole
Springs Antique Rose and Herb Farm, Logee’s,
and Richter’s Herbs.
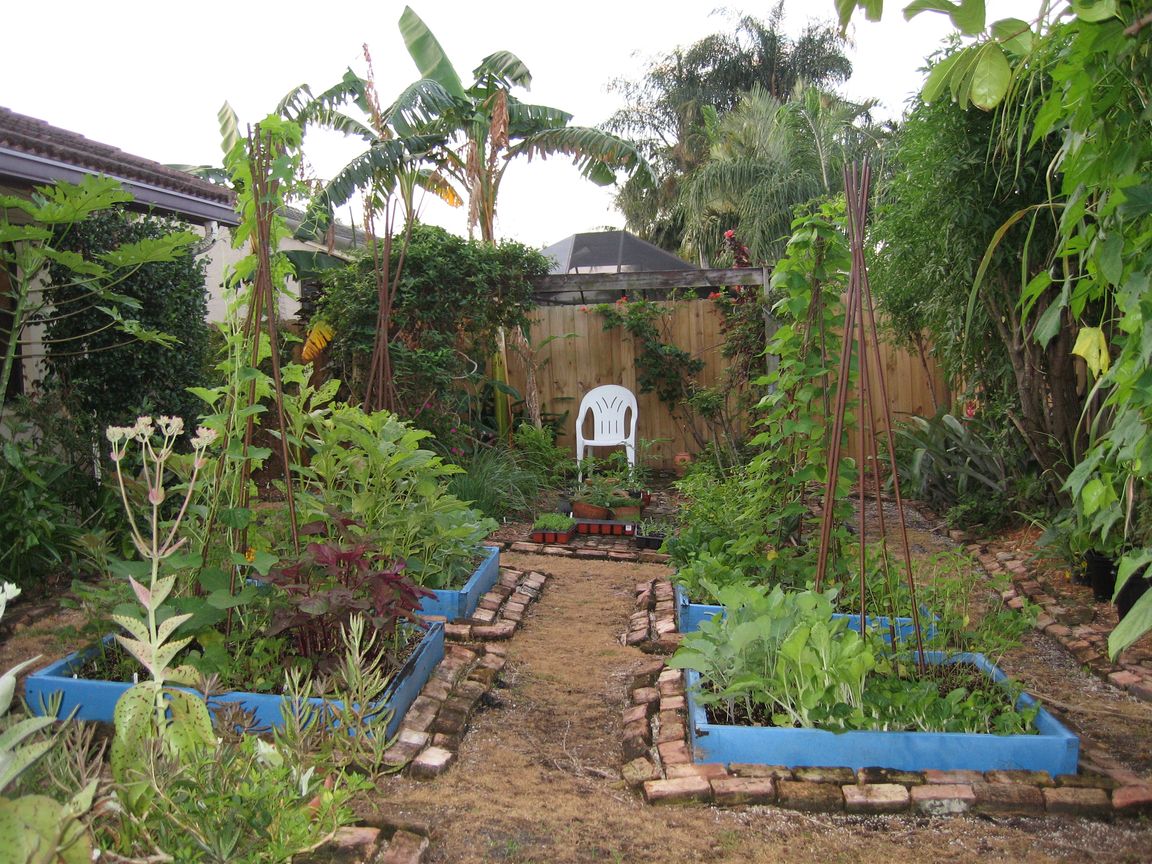
Back garden on 11/16/08
– the grass has been killed in preparation for new sod going in next
week. A note about garden products:
Because white trellis netting was so obvious, I tried repurposing our
black bird netting and found it to be very nice for cucumbers and small
gourds and melons. This would not work
for larger melons, however, or for other heavy climbers. The thin bird netting is not as strong, and
more importantly, it would likely cut into the flesh of the plants once a lot
of weight is put on it. So we are
going to dye our trellis netting black and use it from now on. We will dye some of our twine as well. For tomato support, the hand-down best
product I have found is the Ultimato, which used to be at Home Depot, but now
I can only find it on the Internet.
Try Amazon.com – it’s worth the price, since they will
last several years. This year, I found
some tomato cages on steroids at Target – they are made from thicker
wire and are painted black and will probably work well, but I haven’t
tried them yet. I will post my results
here. Also, we tried Miracle Gro
Organic Potting Mix and were very disappointed with it. Lousy texture and I swear there is sand in
it, even though it says not. Finally
got rid of it by mixing small amounts of it in containers and beds. Will never get this product again! (Looked it up on the Internet and
discovered pretty much the same universal response from gardeners across the
country – sad for the cause of organics, but then again, what was I
expecting from a major carrier of chemical fertilizers?) Ditto the Miracle
Gro Organic Seed Starting Mix – awful!
Had to improvise something else because the nice seed starting mixes
we used to buy are no longer available at Home Depot. Fortunately, they do still carry Lambert’s
Potting Mix, which is excellent. I
highly recommend it – perfect texture.
You can rub some across a screen to make the small bits needed for
starting and covering tiny seeds. Has
a lot of peat moss in it – coconut fiber would be a nice addition
– but it’s still superior to anything else there. Note that coconut fiber is a bad choice for
self-watering containers because it holds too much water, which would cause
your plants to rot. But it’s
great in conventional containers and raised beds, so get some if you find it. Peat moss is not the best environmental
choice, but currently there are not many other options for a soiless
mix. Just make sure it doesn’t
dry out, as it’s nearly impossible to re-wet after that. (For the same reason, tear off and compost
the top part of any peat pot you plant in the ground and cover the edges well
with soil. Otherwise, the pot will
wick the moisture right out of the soil inside it – not what
you’re looking for!) Home Depot has a few organic fertilizers, but most
of them contain blood meal, which often has additives in it that would not be
considered organic by most people.
However, they also have some Terracyle products, which are based on
worm castings. The ones I found at
mine are high-priced and already mixed with water, but Target has gallon-size
jugs of the dry version for about $9, which is actually a good deal
considering how much feeding you get out of it. And the company reuses old milk jugs for
the packaging, which makes me happy.
One day, I’d love to make a worm bin for our kitchen waste
– it could happen this season.
If so, I’ll post details on a dedicated page here. Couldn’t find any fish emulsion or
seaweed products at eaither store, but these can be ordered over the Internet
in powdered form. Fish emulsion smells
terrible, but plants absolutely thrive on it.
I mix it with powdered seaweed in an old hose-end sprayer which
happens to have originally been from a package of Miracle Gro.:) See the Garden Diary for more details. I hope this account will be helpful to you in your own garden! Feel free to email me if you’d like to correspond about gardening here. If I was unable to answer you in the past, as happened with some of you, please accept my apology. Migraines blindsided me, and it took a long time to get to the point of being able to join real life again. Please give me another try! Home ** What's New? ** How It All Started * Garden Update October 2004 * Garden Diary 2008 * Garden Diary 2009 * Garden Diary 2010 * Garden Diary 2011 ** New! Garden Diary 2012 ** Rose and Perennial Court * Rose Update Feb 2003 * Front Garden Update 2008-9 * Behind the Wall * Herb Circle * Tropical Edibles Area ** New! Growing Dinner: Visit to a Homegarden ** Potager * Potager 2004-5 * Potager Plan 2008-9 * Edibles 2008-9 * Crop Chart 2008-9 * Edibles Planting Schedule * Warm Season Planting 2005 * Succulent Beds * Wild Edibles * Caterpillars to Butterflies * Building Healthy Soil * Ecological Gardening * Index of Plants and Techniques Featured * Annual Vegetable Chart * Long Lasting Markers: Jewelry for Your Plants * Build a Gardening Notebook |
|
|